Getting Started with The Payroll Site
This is your guide to setting up your account with The Payroll Site and calculating your payroll online. Pictures shown are screenshots from Firefox. The screen will appear slightly different on other browsers.
Before Setting up Your First Payroll
Before you set up your first payroll, please follow the instructions below.
- If you are not registered with HMRC as an employer, call 0300 200 3211 to register.
- Ensure you are ready for your pension auto enrolment duties.
- Start a free trial with The Payroll Site.
- Log in to the system.
- Gather details of your employees and their pay, tax and NICs for the tax year to date (i.e. since 6th April).
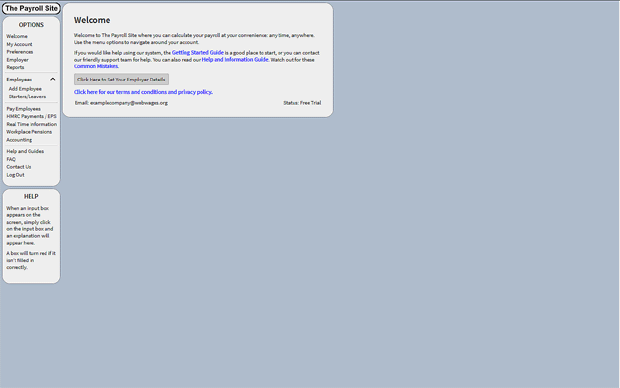
After logging in to the system you should see a screen like this:
Step 1 - Employer Details
This step allows you to enter the name of the employer, as it will appear on the payslip. It also allows you to enter the references that will be needed when you send Real Time Information to HMRC.
Click on the 'Employer' option.
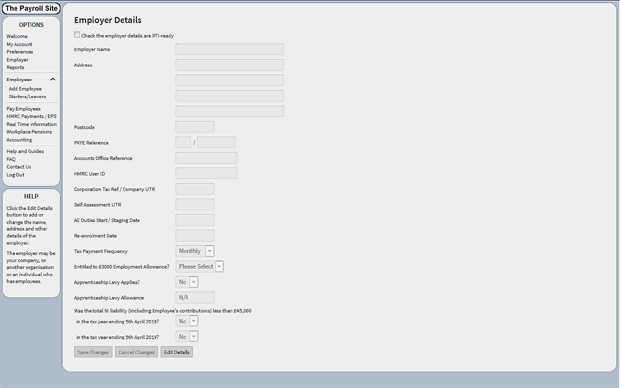
Click the 'Edit Details' button.
You can now type your details into the form. When you click on a field, the help box will automatically give you guidance on filling in that field.
When you have finished entering details, don't forget to click the 'Save Changes' button.
Step 2 - Employee Details
You must add employees to the system before you can calculate their pay and tax. You may wish to add all of your employees or just try the system with one at first. If you make a mistake, you can delete the employee and start again.
Click on the 'Add Employee' option.
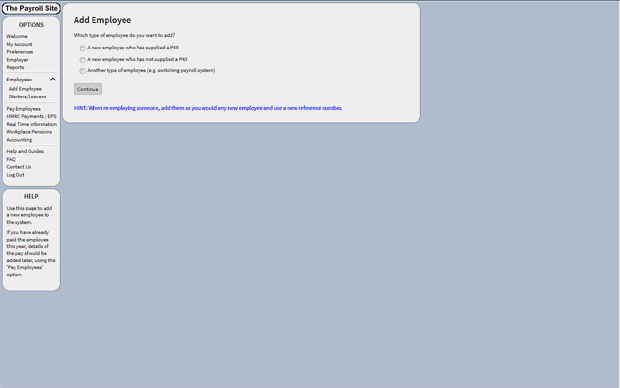
You will be given three options, relating to the type of employee you are adding. If it is a new employee, the system will work out the correct tax code for you. For existing employees, choose the option 'Another type of employee', which will let you set the tax code manually. Initially, the employee details will be mostly blank. When you click on a field, the help box will automatically change to give you guidance on filling in that field. Compulsory fields are highlighted in red. The other fields should be checked and altered if necessary.
If you have been sending Real Time Information using another system, it is important to set the Employee Ref No on this screen to the Payroll ID used by your previous system, otherwise HMRC may assume this person has two jobs with you.
When you have finished entering details, don't forget to click 'Create Employee'.
To add more than one employee, simply repeat this step.
Step 3 - Employees Paid Using Another Payroll System
If you have already paid your employees in this tax year (from 6th April) you will need to enter the details of previous pay runs so that the system can accurately calculate your payroll figures.
If they have been paid more than once, you will need to enter each payment as a separate pay run.
Click on the 'Pay Employees' option and then on 'Start New Pay Run'.
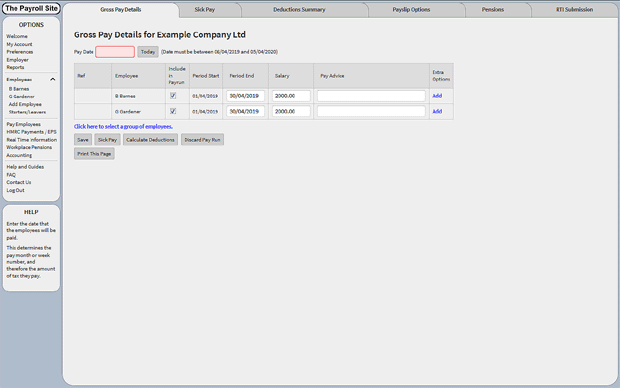
Enter the details of the first time the employees were paid in this tax year (from 6th April). Set the Salary to the total pay in that period. Set the Pay Date to the date when the employees were paid.

Click 'Calculate Deductions'.

Check the Income Tax, Employer's NIC and Employee's NIC. These may differ slightly from the payslip figures calculated using your previous payroll software for reasons that are explained in our Frequently Asked Questions list.
If the figures need to be altered, click the 'Edit' button, change the figures and then click 'Save Changes'.
Once you are happy that the figures are correct, click 'Confirm Payments'.
Repeat these steps for the next pay period, until the pay is up to date.
You are now ready to proceed to the next step.
Step 4 - Your First Payroll Run
Click on the 'Pay Employees' option and then on 'Start New Pay Run'.

If you want to exclude some employees from the pay run, untick the box in the 'Include in Payrun' column.
Set the Pay Date, Salary and other columns as necessary.
Click on 'Calculate Deductions'.
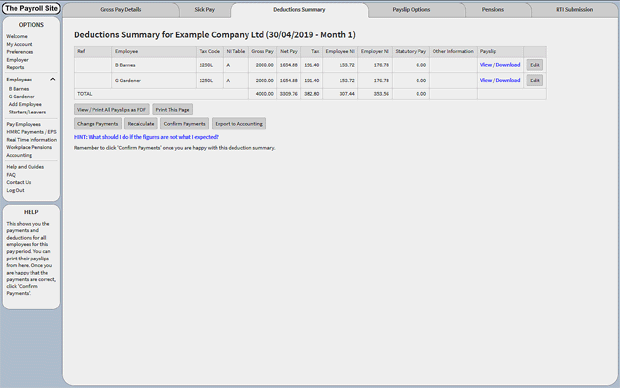
Check that the information appears to be correct.
To view a payslip, click the 'View' link in the Payslip column. Other options, including ePayslips, are available on the 'Payslip Options' page.
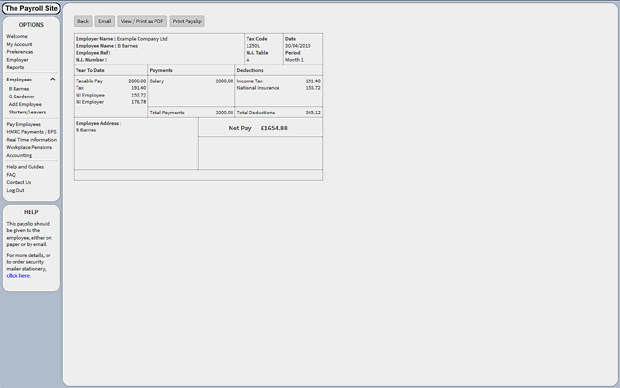
The payslip can be printed by clicking 'Print Payslip'. Click 'Back' to return to the Deductions Summary page.
When you have printed the payslips and are satisfied that they are correct, click on 'Confirm Payments' on the Deductions Summary page.
Next, you must send the Real Time Information to HMRC. To do this, click on the RTI Submission tab and then click 'Create RTI Submission'. The system will create the submission for you to send to HMRC. It will automatically include details of the current pay run and the totals for the year to date.
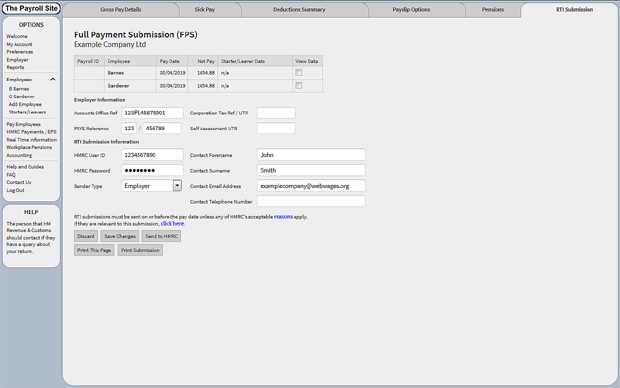
The information must be sent to HMRC by the time you pay your employees.
Once you have confirmed the payments you can reprint payslips or even delete the payments. To do this, click on the employee's name in the options list and then on the Working Sheet tab. This page contains links to all past payslips and an option to 'Delete Last Payment'.
Using the HMRC Payments Page
Click on the 'HMRC Payments / EPS' option. You will see this screen.
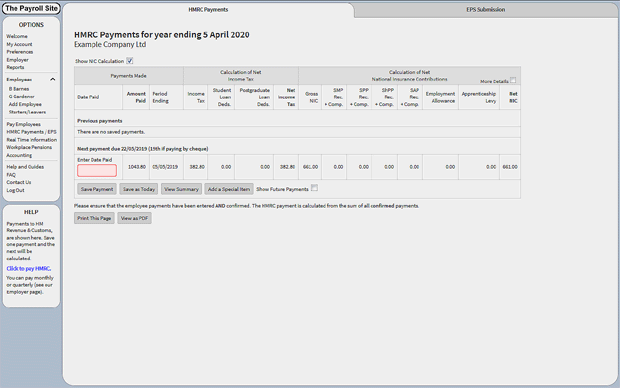
If you pay the Tax & NI due to HMRC monthly by cheque then payment is due to them by the 19th of each month to cover the period from 6th of the previous month to the 5th of the current month. If you pay electronically, it must reach them by the 22nd.
You should save a payment on this screen each month. The system will calculate any amounts owing from the pay runs you have confirmed for that period and show you the amount due in the 'Amount Paid' column. You can either enter the date you are paying, or click 'Save as Today'.
By the end of the tax year you should have 12 payments saved on this screen or 4 if you have an arrangement with HMRC to pay them quarterly and have indicated this on the 'Employer Details' screen.
If you are behind with your tax payments, you may need to make two or more payments together. You can see if you are up to date by checking where it says 'Next payment due'. To make two payments together, click 'Save as Today' twice, then add up the two amounts and pay the total to HMRC.
To actually make a payment to HMRC, you should click on the link within the help box at the bottom left of the screen 'Click to Pay HMRC' and you will be taken to their site where payment options are available.
Remember if there is no tax or NI to pay for a particular period you should still save the payment on that screen.
There are many other features within The Payroll Site, which you are free to explore.